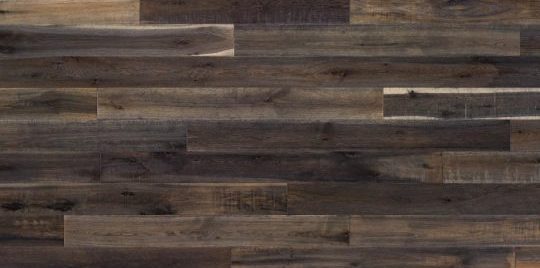
5 Wood Floors – Which to Choose?
5 Wood Floors – Which to Choose?

Eager to get happy at home right now?
Get 10 tips for a happier home!
Wood floors can make a home look larger, feel warmer, be easier to clean, have better indoor air quality for allergy sufferers, and add value when you go to sell that house. But did you know that there is more than one product that will give you the look of a wood floor? Which is right for you? (Grab a cup of tea or a glass of wine – this is a long post!) 😉
Want the short version? Here’s a link to me chatting about the five wood types on New Day Northwest – fun!
1) Site-finished wood
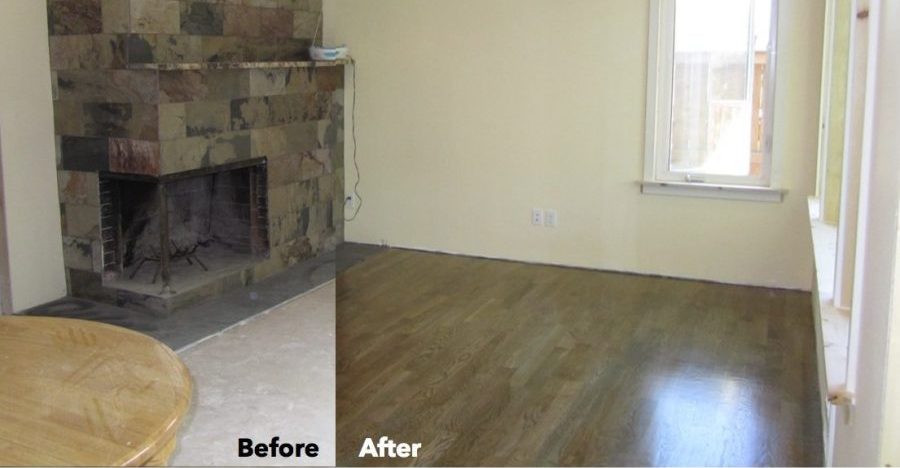
What is it? Unfinished wood that is installed, sanded onsite, then stained whatever color you want.
Pros: “best” in terms of resale value, refinishable many times (it can be patched and repaired seamlessly), complete control over your stain color choice
Cons: limited plank size (usually 2-4″), limited wood species (most commonly oak), not a hand-scraped look, messy and fume-y installation (you’ll want to move out for a week or two), you have to let the surface cure for about a month before you put down rugs, bad around water, can scratch up over time
*Pro tips* If you want an easy to maintain floor, choose a species with some grain, like oak – it’ll mask scratches and wear better than wood with very little grain. While maple, for example, is technically a harder wood (and therefore harder to scratch) it has very little grain so when you do scratch it (which you will) the dents and dings stand out more. Choose a medium color because if you go too dark it’ll show every last fuzz and bit of dust. And ask for a satin finish instead of a glossy finish, since gloss shows off dirt and dust, especially on sunny days.
What to expect: The installers will bring a pile of wood to your home about a week before installation so that it can cure (which just means it needs to acclimate to the temperature and moisture levels of your home). Then they will install it, sand it, do a test of your stain color if requested, then stain it, and finally add a finish coat. It’s a product that will last for generations, so if you are into quality, this is a great choice! But beware – it will scratch over time, and will be ruined if your dishwasher leaks or your home floods. It’s not a product for your bathroom or a damp basement.
2) Prefinished solid wood
What is it? ready-to-install solid wood that comes to your door with a pretty finish already on it
Pros: already finished so very little mess, no smells, fast to install, can be more scratch resistant than site-finished floors in better brands
Cons: can have large seams or look fake, bad around water, usually can’t be refinished
*Pro tips* Just like with site finished wood, if you want an easy to maintain floor, choose a species with some grain that’ll mask scratches and wear, in a medium color, that isn’t too glossy. Also pay attention to the seams between the planks. The bigger or deeper the seams, the less authentic it will look and the more crevices there will be to collect dirt and dust.
What to expect: Just like with site finished wood the installers will likely drop the flooring off about a week before installation to let the wood acclimate to your home. Then the day of installation they start putting the floor down, and you have an instantly done floor. Very little mess, should be no fumes to speak of. You’ll have more choice in plank size, species, and smooth or hand scraped styles, and the factory finish is often more scratch-resistant than site-finished wood. But beware – some pre-finished wood can be refinished, but most can’t, especially if you choose a hand scraped look. Just like site-finished wood it will be ruined if your dishwasher leaks or your home floods. It’s not a product for your bathroom or a damp basement.
3) Pre-finished engineered wood

What is it? ready-to-install flooring that looks just like prefinished solid wood, but unlike solid wood, this is made from alternative layers of plywood topped with a veneer of pretty wood.
Pros: same pros as pre-finished solid wood, but better in a situation like installing over concrete slabs or heated floors where temperature and moisture might fluctuate. It can also give you that farmhouse/handscraped/wide-plank look more easily than either of the solid wood options.
Cons: can have large seams or look fake, usually can’t be refinished.
*Pro tips* Exactly the same as for pre-finished solid wood: if you want an easy to maintain floor, choose a species with some grain that’ll mask scratches and wear, in a medium color, that isn’t too glossy. Also pay attention to the seams between the planks. The bigger or deeper the seams, the less authentic it will look and the more crevices there will be to collect dirt and dust.
What to expect: The installation will be just like it would with prefinished solid wood. You’ll have even more choices in plank size (this is the way to get those really wide, 5-7″ planks), and some brands tout that they can be refinished, but most can’t, especially if you chose a hand scraped look. The really big difference is that this product can handle temperature and moisture variation much better than solid wood. Not only will it do better over a concrete slab (like you might find in your basement or on the bottom level of a modern town home) but you can install it over heated floors! (It’s still wood, so a flood will still destroy it. Don’t put it in a bathroom.)
4) LVP (luxury vinyl plank)
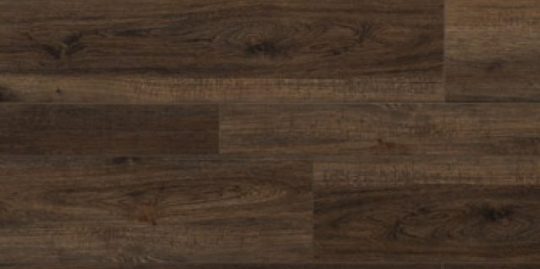
What is it? It’s vinyl that looks like wood!
Pros: Waterproof (since it’s vinyl it’s great in basements or bathrooms where you might have water/moisture issues), thin (great for basements or other rooms where you have low ceilings), and durable! It’s also softer underfoot than wood, so some people find it quieter, comfier and warmer to walk on.
Cons: Not actually wood, can’t be refinished.
*Pro tips* Because this is just a *picture* of wood, not actual wood, avoid the cheapest products. Better brands have more variation from plank to plank for a more authentic look (so you don’t have the same knot in the “wood” repeat in every other plank), and thicker, stronger wear layers. The planks will usually be all the same length (unlike with real wood which comes in varying lengths) so be sure to install it with a varying offset. A common amateur mistake is to install it with the end seams lined up, or with a 50/50 offset. This isn’t subway tile – at least go for a 40/60 offset if you want it to look its best!
What to expect: It’ll come straight out of the box and on to your floor with a quick glue-down or click-together installation. This is not-your-grandma’s-vinyl, so don’t be turned off by the name – it can look great! While you can scratch it if you drag a big piece of metal across it, it’s incredibly scratch-resistant so it’s great for rentals and rec rooms. As you can tell, I’m a fan! 😀
5) “Wood” tile floor:
What is it? It’s not wood – it’s porcelain tile!
Pros: Waterproof, so great for anywhere there is water (like a basement or bathroom) – you can even install it on your shower walls. Because it’s tile you can also install it over heated floors. (The only other wood-look option that works over heated floors is the engineered wood.)
Cons: It’s a harder surface than wood so no good for standing on for long periods of time, and cold if you *don’t* install a heated floor underneath.
*Pro tips* If you want this to look like wood, for goodness sake don’t install it with white grout. Choose a grout color that’ll blend in seamlessly with the wood (usually a shade darker than the tiles, like the color of the grain of the wood). Also, just like with LVP, better brands have more variation from plank to plank for a more authentic look (so you don’t have the same knot in the “wood” repeat in every other plank). The “planks” will usually be all the same length (unlike with real wood which comes in varying lengths) so be sure to install it with a varying offset. A common amateur mistake is to install it with the end seams lined up, or with a 50/50 offset. This isn’t subway tile – try a 30/70 offset if you want it to look its best!
What to expect: This is tile, so it’ll install like tile, set down with mastic, the grouted, and sealed. Watch your labor costs – the tile can be inexpensive, but the installation can more than double that investment.
A quick note on a 6th option: Laminate Floors. Laminate floors usually have an MDF (medium-density fiberboard) backing and a picture of wood on top. While it can look really good (think Pergo brand) most folks are choosing LVP in places where they would previously have installed laminate. Both are very durable and the better brands look really authentic (some laminate looks horribly fake), and both are very cost effective choices. But LVP does great with water, while laminate is destroyed by water (that MDF backer is like a sponge).
A quick note on a 7th option: Sheet vinyl. There are sheet vinyl products that also look like wood and again, in better brands can look quite remarkable. It can be really soft underfoot (especially nice in homes where someone might fall) and are the easiest to clean (no seams). LVP tends to look more like real wood than sheet vinyl because it has individual planks, and is easier for a DIY project than trying to install a big sheet of vinyl across a room.
Overall pro tips: Avoid installing two kinds of wood floors in your home, and especially not right next to each other. For example, if you have wood floors in your hallway, I don’t recommend putting wood tile on your bathroom floor where the two floors will share a seam. The real wood tends to make the fake wood look noticeably fake, plus the two woods don’t match, which makes them look… well, mismatched.
Finally, remember that the fewer floor changes in your home, the bigger and more cohesive your home will feel, so try to stay with one flooring for your main rooms and hallways, and consider using the same carpet in each of the bedrooms, or matching the tile in the entry to the tile on fireplace hearth. If you have to use a different wood product in your basement than on your main level, try to give them a really similar look, and consider carpeting the stairs so you don’t have the two woods right next to each other.
Whew! That was a lot of information! I hope that gives you some helpful knowledge when it comes time to install wood (or wood-look) floors in your home. No matter what, it’ll be beautiful! 😀
And if you need any help deciding which of these wood floors is right for you- give us a shout!
May your home always be happy!


HI, I'M REBECCA WEST!
I’m an interior designer, author, podcaster, speaker, and coach to other designers. (Whew!) But I’m not your classic interior designer because, frankly, I don’t care if you buy a new sofa. I do care if your home supports your goals and feels like “you.” Remember, happy starts at home!
More From Seriously Happy Homes
Are you ready for a seriously happy home?
(Cue the confetti!)

Eager to get happy at home right now?

